Bathroom storage cubes


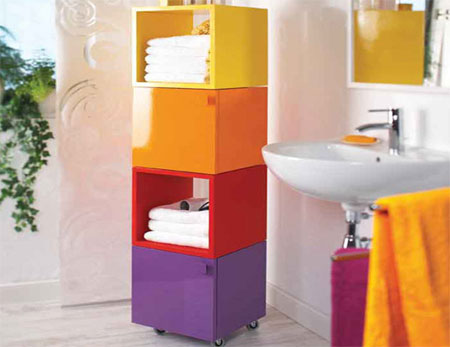
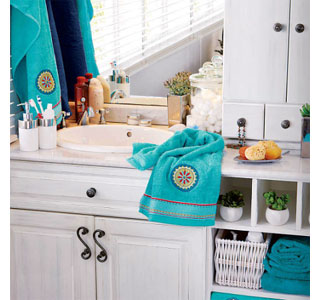
Turn SupaWood cubes into bright cabinets for your bathroom. These cubes are stacked so that they take up the minimum amount of space. Two are left open, and the other two have fitted doors to hide bathroom clutter.


You will need:
16mm PG Bison SupaWood cut to the following sizes:
16 of 16mm SupaWood 330 x 350mm - panels
2 of 16mm SupaWood 350 x 350mm - doors
Masking or packing tape
Piano hinge - 80cm in length
4 Casters
Wood glue
50mm Hex bolt, washers and nuts
12mm and 30mm wood screws
220-grit sandpaper
Acrylic PVA - any colour as a base coat
Paintbrush
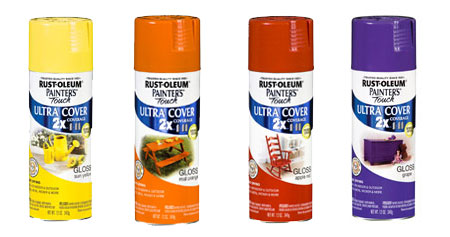
Rust-Oleum 2X Painters Touch in your choice of colours
TOOLS:
Tin snips
Drill/Driver and asstd drill and screw bits
Mitre saw, jigsaw with adjustable plate, or table saw
Here's how:

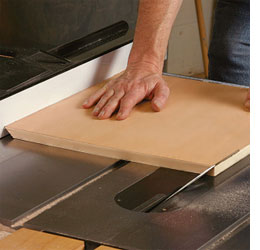
1. Each of the [330mm wide x 350mm] long panels needs to have a mitred edge, so that four sections can be joined to create the cubes.

DIY TIP: A table saw offers the most accurate method of cutting mitred edges. If using a circular saw or jigsaw, use a straightedge and clamps as a guide.

DIY Tip: Miter joints eliminate the appearance of end grain that can be difficult to smooth and paint on MDF. They're made by cutting the two adjoining pieces of timber at 45° and securing with a quality wood glue. However, you can modify this project to use butt joints if you prefer not to angle the edges.


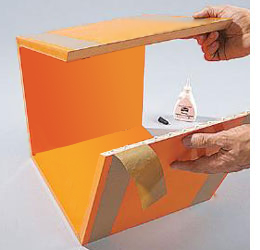
2. Position the panels inside down, connecting them with packaging or masking tape.
Turn the panels over to apply adhesive to each of the mitered edges, taping securely so that the cube holds together until the glue has dried.


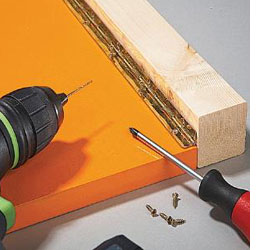
3. Using tin snips, cut the piano hinge the length of the door and use an offcut to align and drill 2mm pilot holes, securing with 12mm wood screws.
Position the hinge on the edge of the cubes, securing top and bottom screws first.
Attach the other side of the piano hinge to the two doors.


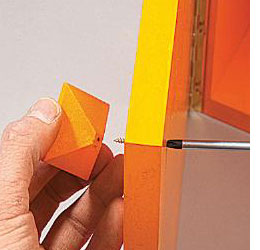
4. Use a mitre saw or mitre box and tenon saw to cut 45 degree ends off a 32 x 32mm pine offcut, cutting one side then rotating and cutting three more times.
Cut the front of the handle square, 5mm from the mitres.
Secure to the two doors with , securing with 32mm wood screws.


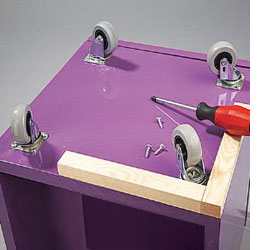
5. On the base of the bottom cube, use a square guide made from pine offcuts to mark the casters in from the edge.
Drill 2mm pilot holes to secure the casters using 12mm wood screws.


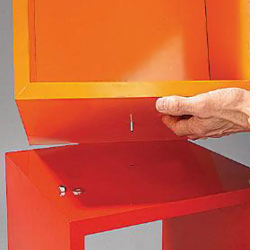
6. Secure the cubes in pairs, drilling a 10mm hole for the securing bolt at the centre of the three top cubes to secure to the cube beneath.
Drill a 10mm hole 36mm deep to countersink the bolt head then use a washer and locknut to secure from below.
DIY TIP: Yyou can also use a 12mm spade bit to create a countersunk hole to hide the nuts.

Finishing
Once assembled, sand the edges of the SupaWood with 240-grit sandpaper until shiny in appearance. Wipe with a clean cloth to remove all traces of dust.
Take the cubes outside and place on sheets of newspaper.

Apply one coat of acrylic PVA as a base coat. Use a foam roller for a brush stroke free finish and, once dry, lightly sand with 220-grit sandpaper.

DIY TIP: I prefer to prime in this way, as it results in using less spray paint.


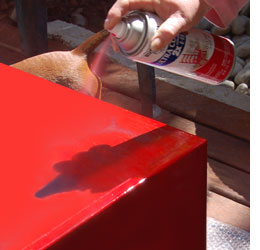
To spray the cubes use Rust-Oleum 2X spray paint in your choice of four colours. We used Gloss Apple Red, Gloss Real Orange, Gloss Sun Yellow and GlossGrape.
Remember to shake the can well before use, and to spray from a distance of no less than 30cm away from the project to avoid drips and runs. You definitely won't need more than two coats.
You will find Rust-Oleum 2X spray paint at your local Builders Warehouse.

  • Digg
  • Del.icio.us
  • StumbleUpon
  • Reddit
  • RSS

Give your home a new look for spring


Instead of getting out the dusters and cleaning equipment, why not use the time to give your home a makeover instead. Spring is just around the corner and you can combine decorating with spring cleaning - and get the two tasks done at the same time!


Colour Your Walls
Completely transform your room with just a few litres of paint. Try a fresh shade, and watch how it transforms all your existing furniture. Paint costs so little compared to how much you get in return. Pop into your local Prominent Paints store, orDecorating Centre and let the helpful staff guide you with your colour choice and the perfect paint.

LEFT: A grid of nine colourful paintings pops against a deep grey wall.

You can easily create your own wall art with recycled pizza boxes!
Or make your own uniquecanvas art to match you decor style.
We even show you how tomake your own canvas frames! 

Or fake it with a colour-blocked wall! 


Rethink What You Have
It costs nothing to reassess what your room already looks like.
Why not move a few pieces around for a completely new look. They say that a change is as good as a holiday!
Sometimes a fresh approach encourages you to get rid of tired pieces that drag your space down. Or you could consider giving them a makeover with a few coats of paint and some new hardware.

Do you really need everything you see? Does everything have a purpose and a special meaning to you? If not, then give it away. I promise, less is more.

Choose Lighting Wisely
Adding dimmers to your space offers dimension and mood at very little cost.
Or buy a fresh shade for your lamp.
Consider replacing mismatched floor lamps with two, new matching lamps. Place one on either side of your sofa or bed, and see how the room suddenly has cohesive style.


Update Your Cushions
Can't afford a new sofa? There are dozens of affordable, fabulous cushions that are one of a kind and will zip up your space instantaneously.
LEFT: Cushions from the new summer range at Mr Price Home.

If you're feeling creating, find out how to transform plain cushions with a little paint!

Try a Mirror
Can't afford art? You can find unique mirrors at discount stores or vintage shops that, when grouped together, will bring elegance and personality to even the smallest of spaces.

We'll even show you how to make antique-looking frames that cost practically nothing!


Recover and Renew
If you can't afford to buy a new chair? Give your existing one a makeover by recovering it in a new pattern.
Get a little daring and see how a simple chair can be completely transformed.
Or even better, make your own chairs, add an upholstered seat and throw over a slipcover.


Add Window Treatments
Check out every window in your house. Window treatments are instrumental in bringing dimension - not to mention light - into a room.
You can revamp any space by simply investing in newcurtains or blinds: Go for velvet or a bold pattern in a smaller room to give a luxe jewel-box effect.
Elegant yet simple curtains for spaces can often offer all the change you need.


Update and Refresh
If you're still using towels and linen that you purchased when you first got married, perhaps it's time to toss out and refresh.
Most plain, white bathrooms welcome a splash of colour, and you can spoil yourself in the luxury of soft, fluffy towels.

RIGHT: The new summer range from Mr Price Home.

  • Digg
  • Del.icio.us
  • StumbleUpon
  • Reddit
  • RSS

Decorating with yellow, changes your property's look


With its sunny appeal and versatile nature, yellow is one of the most popular colours for decorating. It warms up a cool room and brightens a dark space, but you need to keep in mind a few guidelines when using yellow, so that it does not overpower.


Although you may think that mixing yellow with other colours could be tricky, try mixing it with pink, turquoise, green, or even purple and orange.
Even the most unlikely pairs can work if you use the right amount and intensity.

ABOVE and BELOW: For a bold, graphic feel, add black and white accessories with strong silhouettes to a room already vivid with colour. A yellow and white room tempered with bits of black is guaranteed to be cheerful.


What it's paired with with red, yellow takes on a reddish hue, but when paired with green, it takes on a citron-ish hue. No matter how much time you spend pouring over paint chips, you never really know how yellow will look until the room is complete.
Yellows moving towards red are warm and welcoming, which makes than ideal for large walls and piece of furniture - especially in rooms that are south-facing and otherwise cold. Yellows such as pale citron or mellow ocher are usually easier to incorporate than brighter tones, which can quickly become overbearing.


ABOVE and LEFT:

Pale, buttery yellows are considered as neutral and can work in almost any setting.

Soft, muted yellows are easier to use than bright hues, which can become overwhelming.

Use soft tones for walls and large pieces of furniture and save the stronger shades for accent pieces.


Yellows on the blue side of the colour wheel seemer colder and vivid.
For a pop of citrus fresh colour in a south-facing room, try combining yellow and lime with pops of red to warm up the cool colour.
If your goal is a vibrant, sunny room, be cautious when choosing colours. What appears just right on the paint swatch will usually intensify once it’s on your walls.
It's a good idea to pick out a colour that looks good on the swatch and then go a few shades lighter.

It may take a few attempts before you find the shade you had in mind, but paint is one of the most affordable ways to add colour and a few tester pots to try out on the walls will help you decide if you can live with it. After a few days, you’ll have a clearer sense of whether that daffodil hue is refreshingly jaunty or just plain overstimulating.
Cottage style, modern or traditional, when combined, yellow and white refresh and revatilise even the dullest setting. If you want to paint the wall in a strong yellow, try to balance it with neutral furnishings. Paint the trim white to give it a crisp look.
The high contrast of yellow, black, and deep taupe gives the living room of a Los Angeles house "a smoky, glamorous, old-world Hollywood style," says designer Mary McDonald. "And all the symmetry with the furniture placement gave me the most latitude in creating several seating areas for entertaining — anchored by that big pouf."
Don't be afraid to mix several shades of yellow in the same room. Just be sure to ground it with something else. Black is always a good choice. It will connect all the shades together and give the eye a place to rest.
A formal living room gets a cheeky colour treatment with deep brown walls accented with egg-yolk yellow accessories. A deep colour needs strong accents for contrast.

BELOW: Step up from the start, white minimalist look by adding splashes of vibrant yellow. Because yellow is a strong colour, you might not want to have too many large scale pieces done in it. It can become overwhelming so it's well-suited to side chairs and accent pillows than it is large sofas.
The yellow in the room above prevents the room from feeling washed-out and bland. When introducing yellow pieces, try to match the vibe of the room - an upholstered screen against a white white; a bright chair with a crisp, contemporary design.
Pair yellow with crisp white for a setting that is refreshing, sunny and traditional. These two colours are perfect for a small kitchen that does not receive a lot of natural light. Now, add a splash of black here and there and you have a more modern look.
It's easy to add sunny yellow, citrus yellow, green or yellow-green colour tones to your kitchen, dining room or living  room decor with small inexpensive decor accessories, saving you money on spring decorating and creating beautiful natural accents with warm or relaxing shades that match your home interior colour schemes.

  • Digg
  • Del.icio.us
  • StumbleUpon
  • Reddit
  • RSS

Tin potted plants - let your home smiles


Recycle old paint or coffee tins into attractive plant holders that can be hung in the garden to decorate a plain wall.


You will need:
Paint or coffee cans
Rust-Oleum painters touch spray paint
Masking tape and/or stickers for lettering
Hammer and nail
Hooks for fence (if you will be hanging your planters)


Here's how:
1. Clean off any labels for the cans and scrape off glue from the sides. Spray paint your cans with your first colour of spray paint. Allow to dry thoroughly, usually at least 2 to 3 hours.

2. Apply masking tape in your design of choice. In my case, I wanted striped cans so I used the masking tape to allow for green stripes underneath. Apply your second colour of spray paint and allow to dry thoroughly. When dry, gently remove your masking tape.

3. Add your word of choice with simple stickers. In my case, I spelled out the word"BLOOM" for my third paint can. I also applied more masking tape to my striped cans so I would end up with a third white stripe, and then spray painted them with a third shade of white. When dry, gently remove your masking tape and/or stickers.

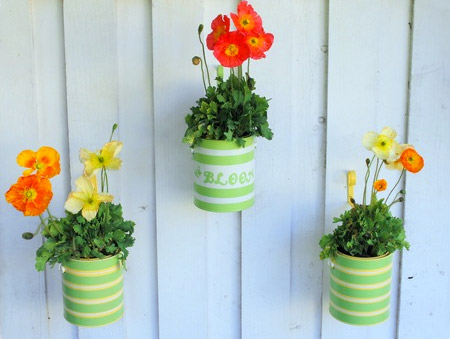
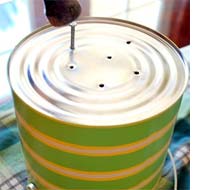
4. Use the hammer and a nail to puncture drainage holes in the bottom of your paint can. Use a towel underneath your can so you don’t cause any damage to your paint.

5. If hanging your planters, then screw your hooks into your fence. Painting your hooks ties the whole look together.

6. Add gravel to the bottom of your planter, then some potting soil and your favourite blooms.


Using outdoor spray paint will allow your cans to withstand the seasons, and the sun’s rays. Can you believe such an industrial object could turn out so lovely? 

  • Digg
  • Del.icio.us
  • StumbleUpon
  • Reddit
  • RSS

Is your property wishing for a new look this summer?


If you find that your living spaces are feeling a bit down in the dumps, perhaps it's time to freshen up with subtle colours. There is a growing trend for our living spaces to be simpler, pared down and offering relief from the pressures and anxieties of the outside world.
Spring is a wonderful time to take steps to make your home comfortable and casual to enjoy during the summer. While any style of decorating has elements that can be formal or casual, there are certain things that you can do to any room to make it feel less structured and more relaxed.


Not quite white
It’s the details that make this living room, from the subtle stripe in the sand-coloured rug, the driftwood coffee table and the hint of blue in soft furnishings.
To achieve a casual look, pieces are often long, large, and horizontal, rather than vertical and tall and petite. Tables are chunky and of a large scale, which gives a comfortable feeling, while providing space for storage and spreading out. This helps to create a restful look.
Use neutral tones for large pieces such as chairs and sofas; add vibrant colour with accent pillows, throws, and collectibles. Choose fabric and accessories in a variety of textures, shapes, and styles to create depth. Make custom slipcovers out of sheets to refresh and reinvent worn, dark furniture. Monochromatic colour combinations such as cream and white, icy blues, pale greens, and butter yellows lend a clean, simple feel.
Fresh accents
Transform pine furniture with shades of lightest blue, ivory and white to brighten interiors.
Select a few of your favourite pieces, whether artwork, notes, photos, or mementos, and display them. Resist the temptation to clutter - stay current by replacing old with new as they come along.

Sea hues
Shades of aqua and cream mirror the vast ocean and sandy beach outside. A wicker accent table paired with a streamlined sofa introduces a mix of soft and strong elements to create a clean but comfortable feel.
Comfortable interiors
Formal or casual, urban or country - your home should feel comfortable and design plays a big part in that. Good design is not an exact recreation of a magazine photo - your home should be made up of what is important to you; your collections, family photos, old furniture with a history, reminders of travels or summer holidays - those are the design elements which make your homes comfortable, unique and most importantly interesting to the rest of us. 
Simple living
From the oversize sofa and basketware to the whitewashed everything, this living room (ABOVE) is quintessentially shabby-chic.
Remove obstructions from doorways and windows. The more easily you can see into and through a room, the larger and more open it will feel. Inexpensive roll-up reed or bamboo blinds provide privacy without obscuring daylight. Crisp white linen or gauze fabric can be draped over a black-painted dowel, found at home improvement stores, for a quick yet airy window treatment.
With homeowners on the lookout for more relaxed lifestyles, many homes today are totally decorated using the elements of casual decorating. The elements of a casual style of decorating can sneak into most any room and make it feel comfortable.

  • Digg
  • Del.icio.us
  • StumbleUpon
  • Reddit
  • RSS

A home with an entrance to remember


When welcoming guests into your home you want to make a big impression - a "wow" moment - something that they will remember long after they have left, and possibly even want to duplicate in their own home!
image elizabeth kimberley
As an integral part of a home, an entrance should just look good - it needs to be practical too. And you don't need a large space to be able to have an entrance with impact - a small shelving unit, a bookshelf or a table can be used to make even the smallest space stylish!
One simple and very affordable way to make an impact - even in a plain entrance - is to add a console table.
Just this one single piece of furniture will make a statement when dressed to impress.
These tables can be a beautiful focal point in any room in a home, but are definitely a "must have" for an entrance way!
Once you have your console table it's time to get down to the dressing and styling to create your new entrance.
image m.design

While the secret to the perfect display is creating a vignette (a small collection or display), it's not always necessary to go to that extent - it’s a matter of personal taste and ensuring that you keep in mind a few design rules: balance, colour, texture, and scale of the items you wish to display.

BELOW: When taking design elements into consideration, this setting has balance, the colours fit in with the setting without overpowering or disappearing, various textures are incorporated and there are various heights that flow from side to side.
image james michael howard

When designing and decorating your entrance, bear in mind three commonly used arrangements:

1. Symmetry
While an arrangement that is symmetrical appears to be more formal and organised in its layout, a symmetrical arrangement is one of the easiest to create. The eye is naturally drawn to ordered arrangements.
BELOW: To create a symmetrical arrangement two table lamps are placed on either side of a wall-mounted mirror. Additional symmetry is added with two chairs at either side of the console table, with art hung directly above. All these components create an ordered and well designed vignette.
image james michael howard
Now add a mirror - perfect for creating the illusion of space if you are tight on square footage. A piece of art will also work well.

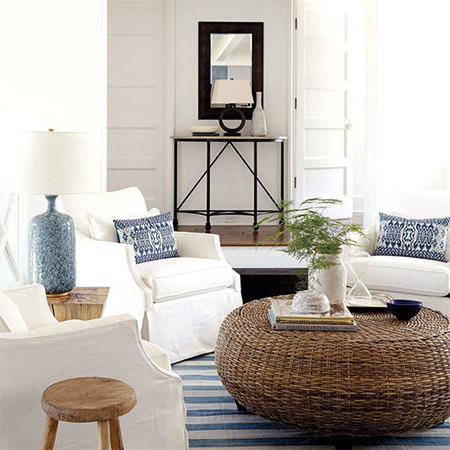
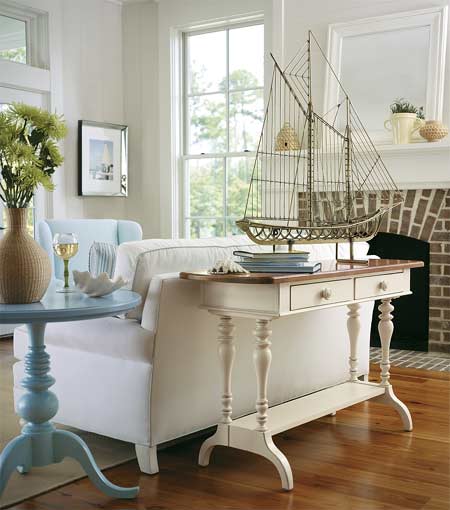
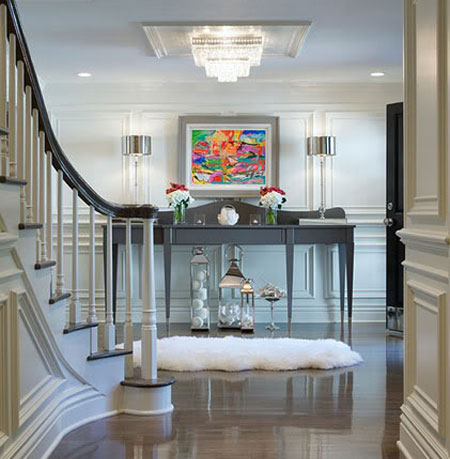
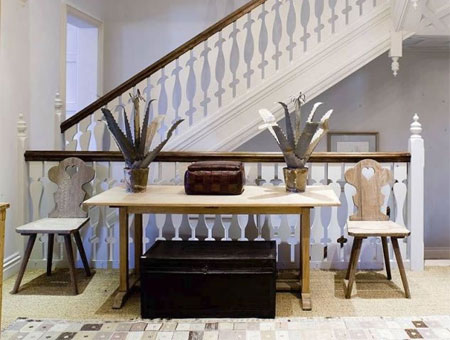
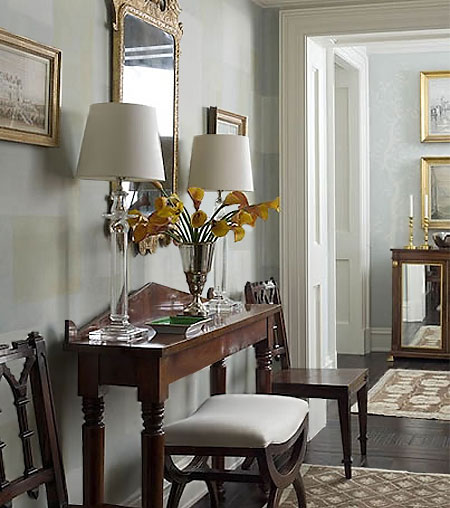
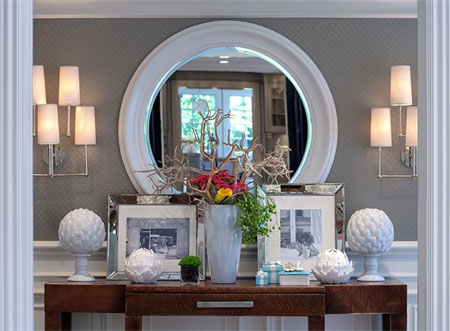
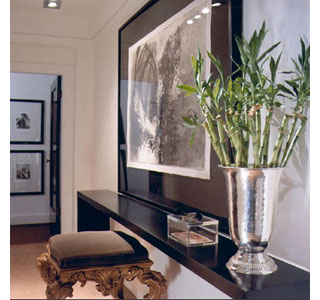
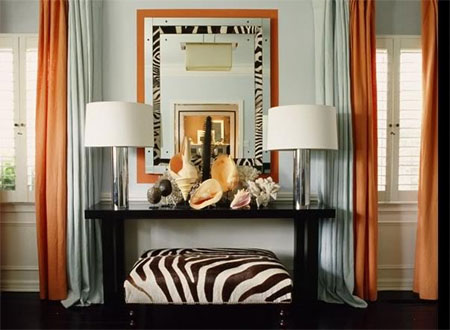
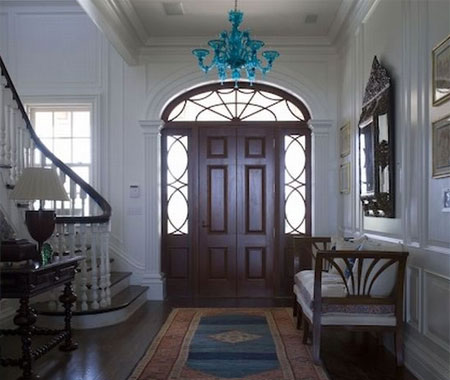
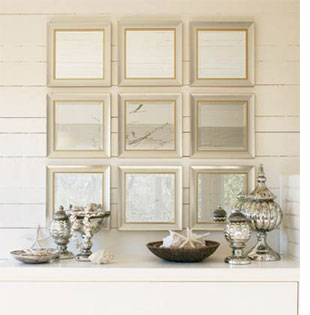
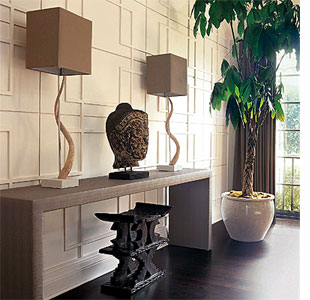
Get together all the pieces that you would like to display on the console table and start arranging.
You can take as long as you want to set everything out until you are satisfied.

LEFT: Two tall lamps are placed on either side of a smaller artwork.
Finally, it's time to add some atmosphere lighting.
image decorpad
2. Asymmetrical
While we are naturally drawn to an ordered arrangement, an asymmetrical - or casual - arrangement can be just as intriguing!
With a table vignette this is normally achieved by placing one tall item - in this case a vase - alongside a single or arrangement of smaller items.


3. Private collections
A collection of like items showcased together can make a powerful statement, especially where objects are of a similar colour but of varying heights, shapes and textures. - adding visual interest.

image mary mcdonald
image james michael howard

  • Digg
  • Del.icio.us
  • StumbleUpon
  • Reddit
  • RSS