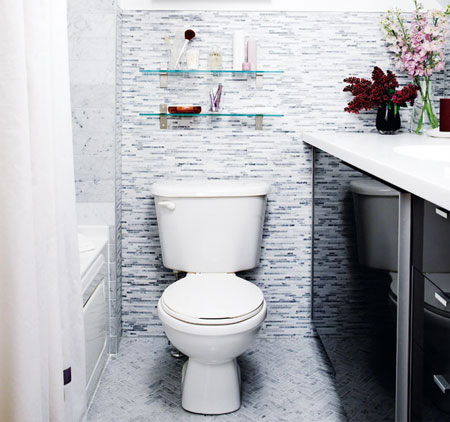
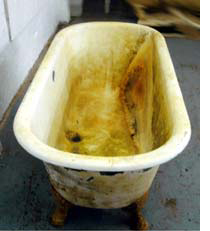
If your bathtub, sink or tiles are starting to look a little old and dated, then refinishing it may help to increase the value of your home by improving the look of the bathroom.
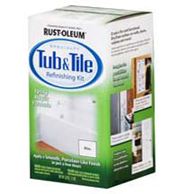
Now in South Africa, Rust-Oleum have launched the Tub & Tile Refinishing Kit, a two-part epoxy acrylic formula that allows you to refinish your sanitary ware for a professional finish and provides superior adhesion and excellent wear and abrasion resistance in high-moisture areas.
With proper care, sanitary ware painted with this product will retain a hard, glossy finish for many years.
 If you want a new look for your bathroom, but don't want to spend thousands of rands remodelsing, then refinishing is your best value.
Replacing the bathtub alone can cost as much as R2,000. With refinishing, you only pay a small fraction (as little as 10 percent) of the cost of replacement.
And anyone who has ever replaced the tiles or sink in their bathroom knows the mess and hassle of demolition, as well as the hole it can put in their wallet.
The Simple Solution
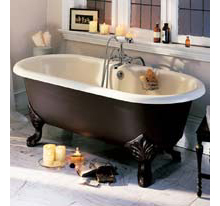
Now you can transform a tired and dated bathroom to look like new in less than one day, which is excellent news for those homeowners looking to sell their property in a hurry!
And the good news is that refinishing your sanitary ware will make your bathroom look and feel like new, without the time, cost and inconvenience of replacing.
Step-by-Step: Preparation
The procedure involved in refinishing your surfaces is as easy as 1-2-3. You won’t need industrial cleaners or acids, the application is easy and you can start and finish in one day.
Proper surface cleaning and preparation is key to a smooth, lasting finish. Follow all directions carefully and completely. The only necessary preparation is to remove all metal drains, scrub the surface with an abrasive pad and cleaner to get rid of all traces of grease, mould, soap film and hard water deposits, and silicone sealer, and the to lightly sand the area with 400-grit sandpaper.
Step-by-Step: Application
The Rust-Oleum Tub & Tile Refinishing Kit comes with a complete set of application instructions that allows you to renew ceramic and porcelain tile, cast iron and steel tubs and sinks.
The product is mixed according to the manufacturer’s guidelines and then applied to the surface.
To apply you can use a high quality, fine bristle varnish brush, a quality short nap roller, or spray applicator.
The product dries to the touch in less than one hour and to handle in 3 hours, and is fully dry in 18 hours. It is recommended that you allow the paint to dry at least 3 days (72 hours) before exposing to water.
Clean up is just as easy as application: Clean all painting tools and any paint spills immediately with lacquer thinner.

Maintenance and care
With proper care, surfaces painted with Rust-Oleum Tub & Tile will retain a hard, glossy finish for many years. For routine cleaning, use non-abrasive cleaners and mild detergents only.
With proper care, surfaces painted with Rust-Oleum Tub & Tile will retain a hard, glossy finish for many years. For routine cleaning, use non-abrasive cleaners and mild detergents only.
Safety First
As with any chemical-based product, always follow the manufacturer’s recommended instructions.
As with any chemical-based product, always follow the manufacturer’s recommended instructions.


 On the computer, I enlarged it to the size I wanted (the widest part of the car slightly larger than the width of the existing headboard), but it probably would have been easier to rent an overhead projector and enlarge it that way.

 Use a pencil to outline the mark to make more visible and then cut out with ajigsaw.

 You will need:
 Flowers
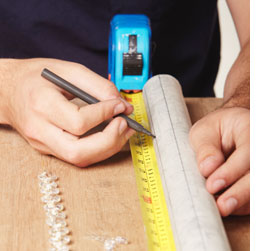 1. Marking up